How to assemble your shade structure
Blackrock Hardware strongly encourages you to
- Keep an inventory list with your shade parts and check that you have ALL your parts while packing and again during the dis-assembly.
- Bring all tools necessary for assembly.
Instructions for 2023/24 Kits
Recommended tools
- Work gloves (the poles get hot in the sun)
- Pliers or sturdy screwdriver for tightening connector eye bolts, don’t over do it.
- Something to stand on. A sturdy chair or cooler will do for some, shorter folks may need a ladder.
- Cordless drill/driver to screw lag-bolts
 Step 1: Lay out roof poles
Place all roof poles on the ground next to corresponding fittings as shown.
12′ x 20′ shown, double for the 24′ x 20′.
For shade larger than 24′ x 20′, begin by assembling 24′ x 20′, then add sections as described in Step 7.
 Step 2: Connect roof poles
Connect all roof pipes and fittings. Make sure to place all five-way fittings with the vertical extension facing down. Tighten eye bolts gently with a tool. Do not over tighten.
 Step 3: Attach tarp with ball bungees
Lay tarp over assembled roof frame. Start by attached the tarp corners to poles with ball bungees*. Use two ball bungees at each corner, one for each pole. Once corners are fastened, use a ball bungee at every grommet to secure the tarp.
*To use a ball bungee, push elastic through grommet and pull until the plastic ball is resting against the tarp. Loop elastic around the poll and back over the plastic ball.
 Step 4: Raise half the roof
This step is best done with 2-3 people.
Lift one side of the roof and insert leg poles into the fittings, make sure the leg button snaps into the 5-way hole and tighten eye bolt for each leg.
 Step 5: Raise the roof
Lift the opposite side of the roof and repeat above instructions inserting remaining leg poles into the 5-ways.
 Step 6: Drive your lag bolts
Move to the final location, make sure the legs are even and straight. Drive lag bolts into one of the foot holes after attaching the foot pad to the bottom of the leg. Make sure the button on the leg mates with the foot pad hole, tighten the eye bolt on the foot to the pole. Repeat with remaining legs. This is a fast and easy setup and makes moving the structure to a new location easy.
Check all of the leg fittings top and bottom daily.

Step 7: For shade structures 36′ x 20′ & larger
If you bought a 36′ x 20′ kit, or add-on kits, first erect 24′ x 20′ of your shade as described above.
For the remaining 12′ x 20′ sections
- Assemble the roof poles on the ground (steps 1 & 2)
- Add one half of the legs (step 4), and attach to side of the 20′ x 24′. Tighten all eye bolts.
- Adjust the legs to straight vertical positions. Move to the side, then see (step 6)
- Attach the roof tarp (step 3) at the erected height. A step ladder is useful.
Blackrock Hardware shade and rain:
Blackrock Hardware shade is great for what it says: shade. However, in the rain, the flat roof will collect water. If this happens simply tip the water off the roof tarp with a broom handle or cut a small hole in the center of each 10′ quadrant for drainage.
Instructions for 2022 Kits
Recommended tools
- Work gloves (the poles get hot in the sun)
- Pliers or sturdy screwdriver for tightening connector eye bolts, don’t over do it.
- Something to stand on. A sturdy chair or cooler will do for some, shorter folks may need a ladder.
- Cordless drill/driver to screw lag-bolts
- Adjustable crescent wrench to tighten set bolts on legs
Instructions 2022
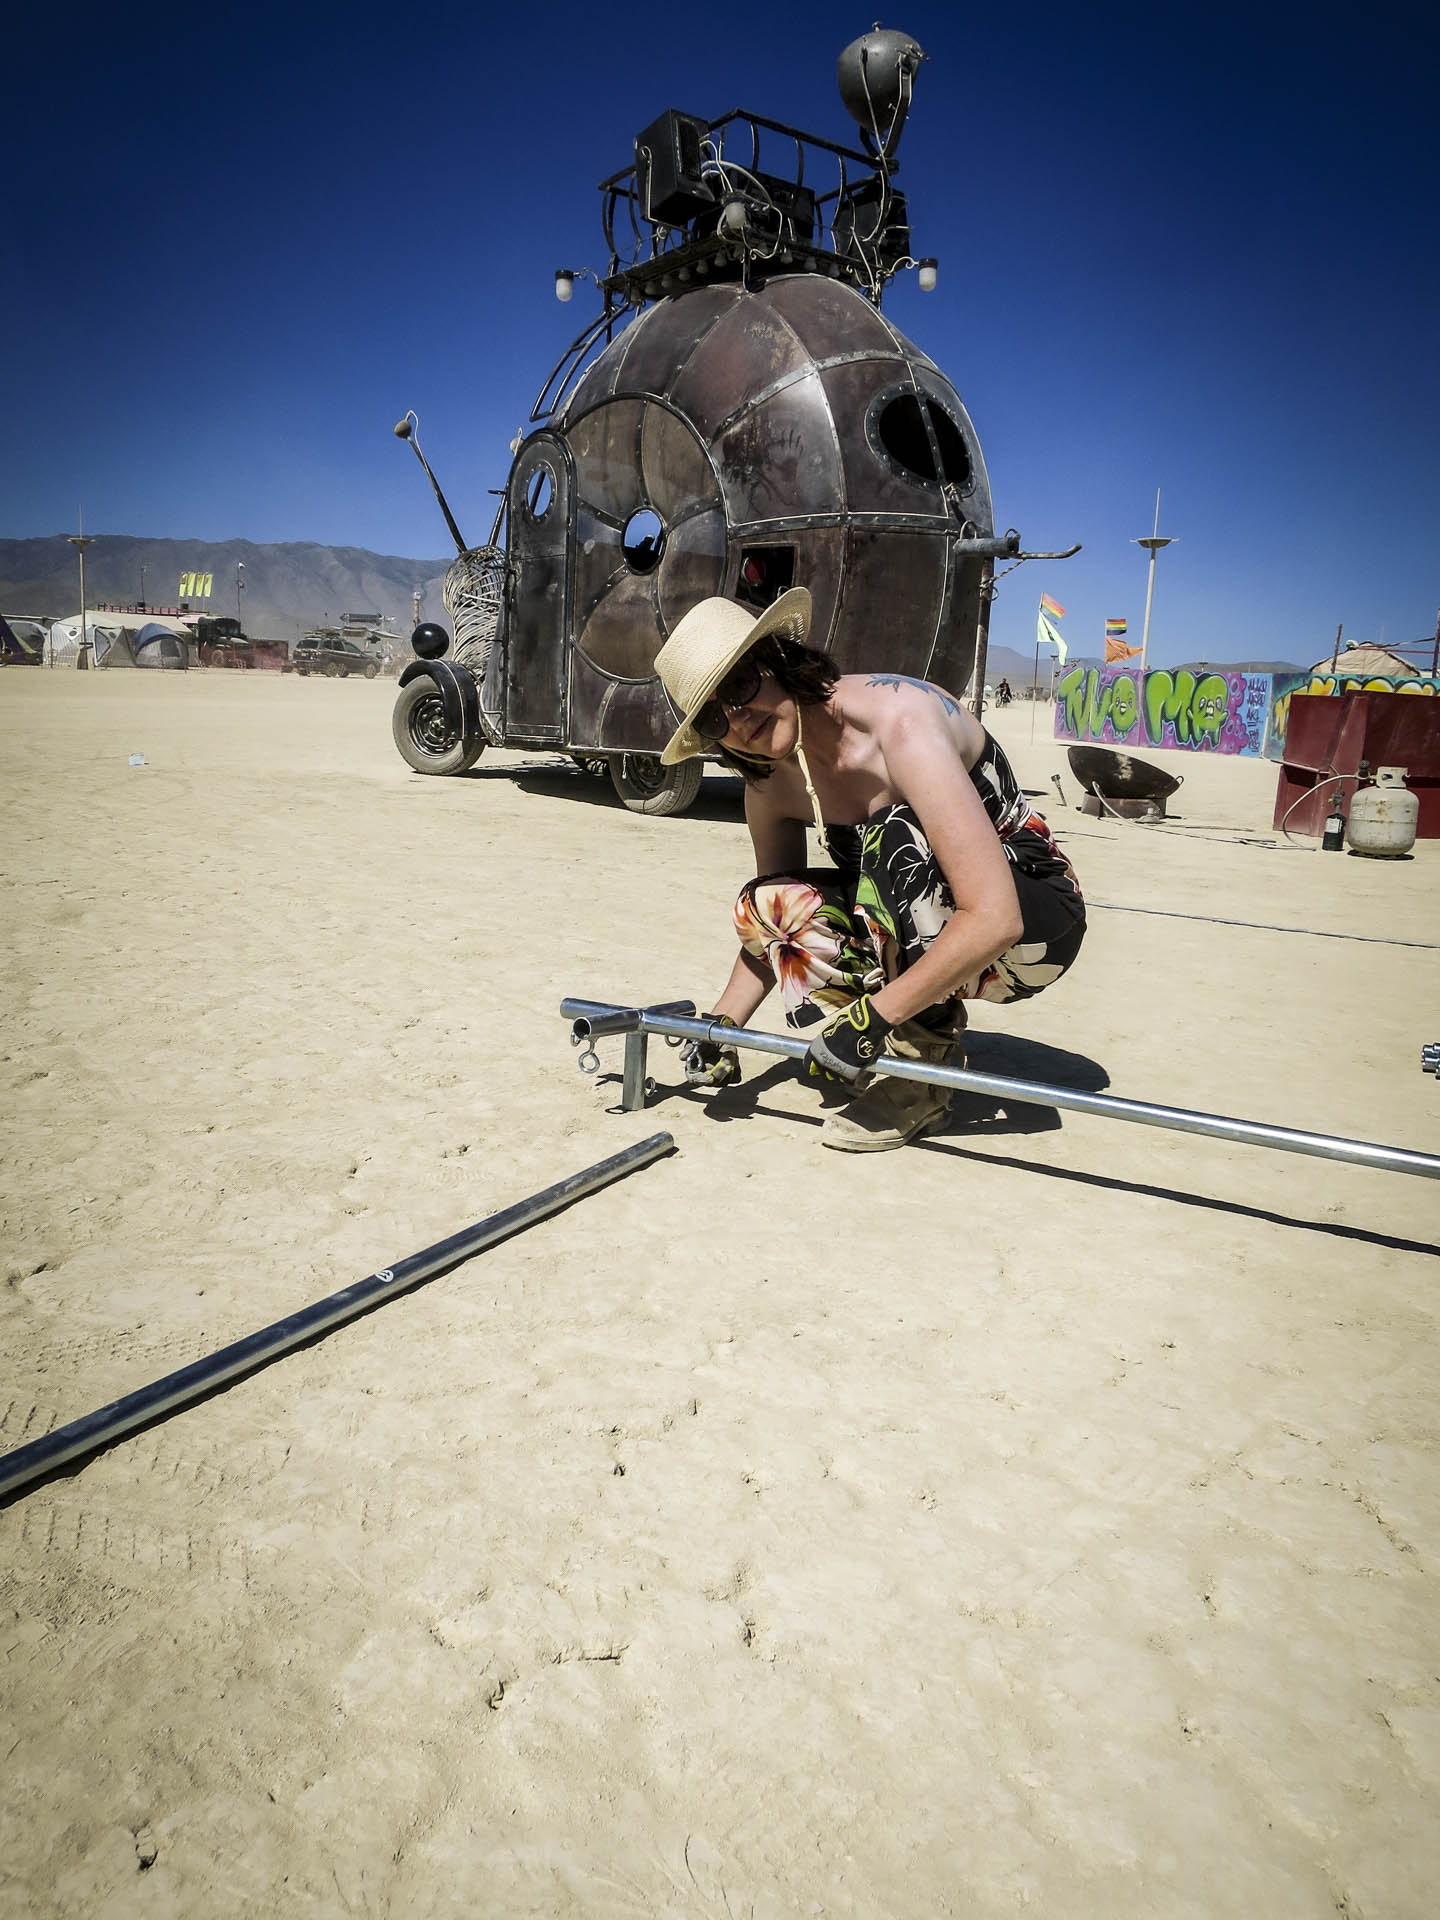 Step 1: Lay out roof poles
Place all roof poles on the ground next to corresponding fittings as shown.
12′ x 20′ shown, double for the 24′ x 20′.
For shade larger than 24′ x 20′, begin by assembling 24′ x 20′, then add sections as described in Step 7.
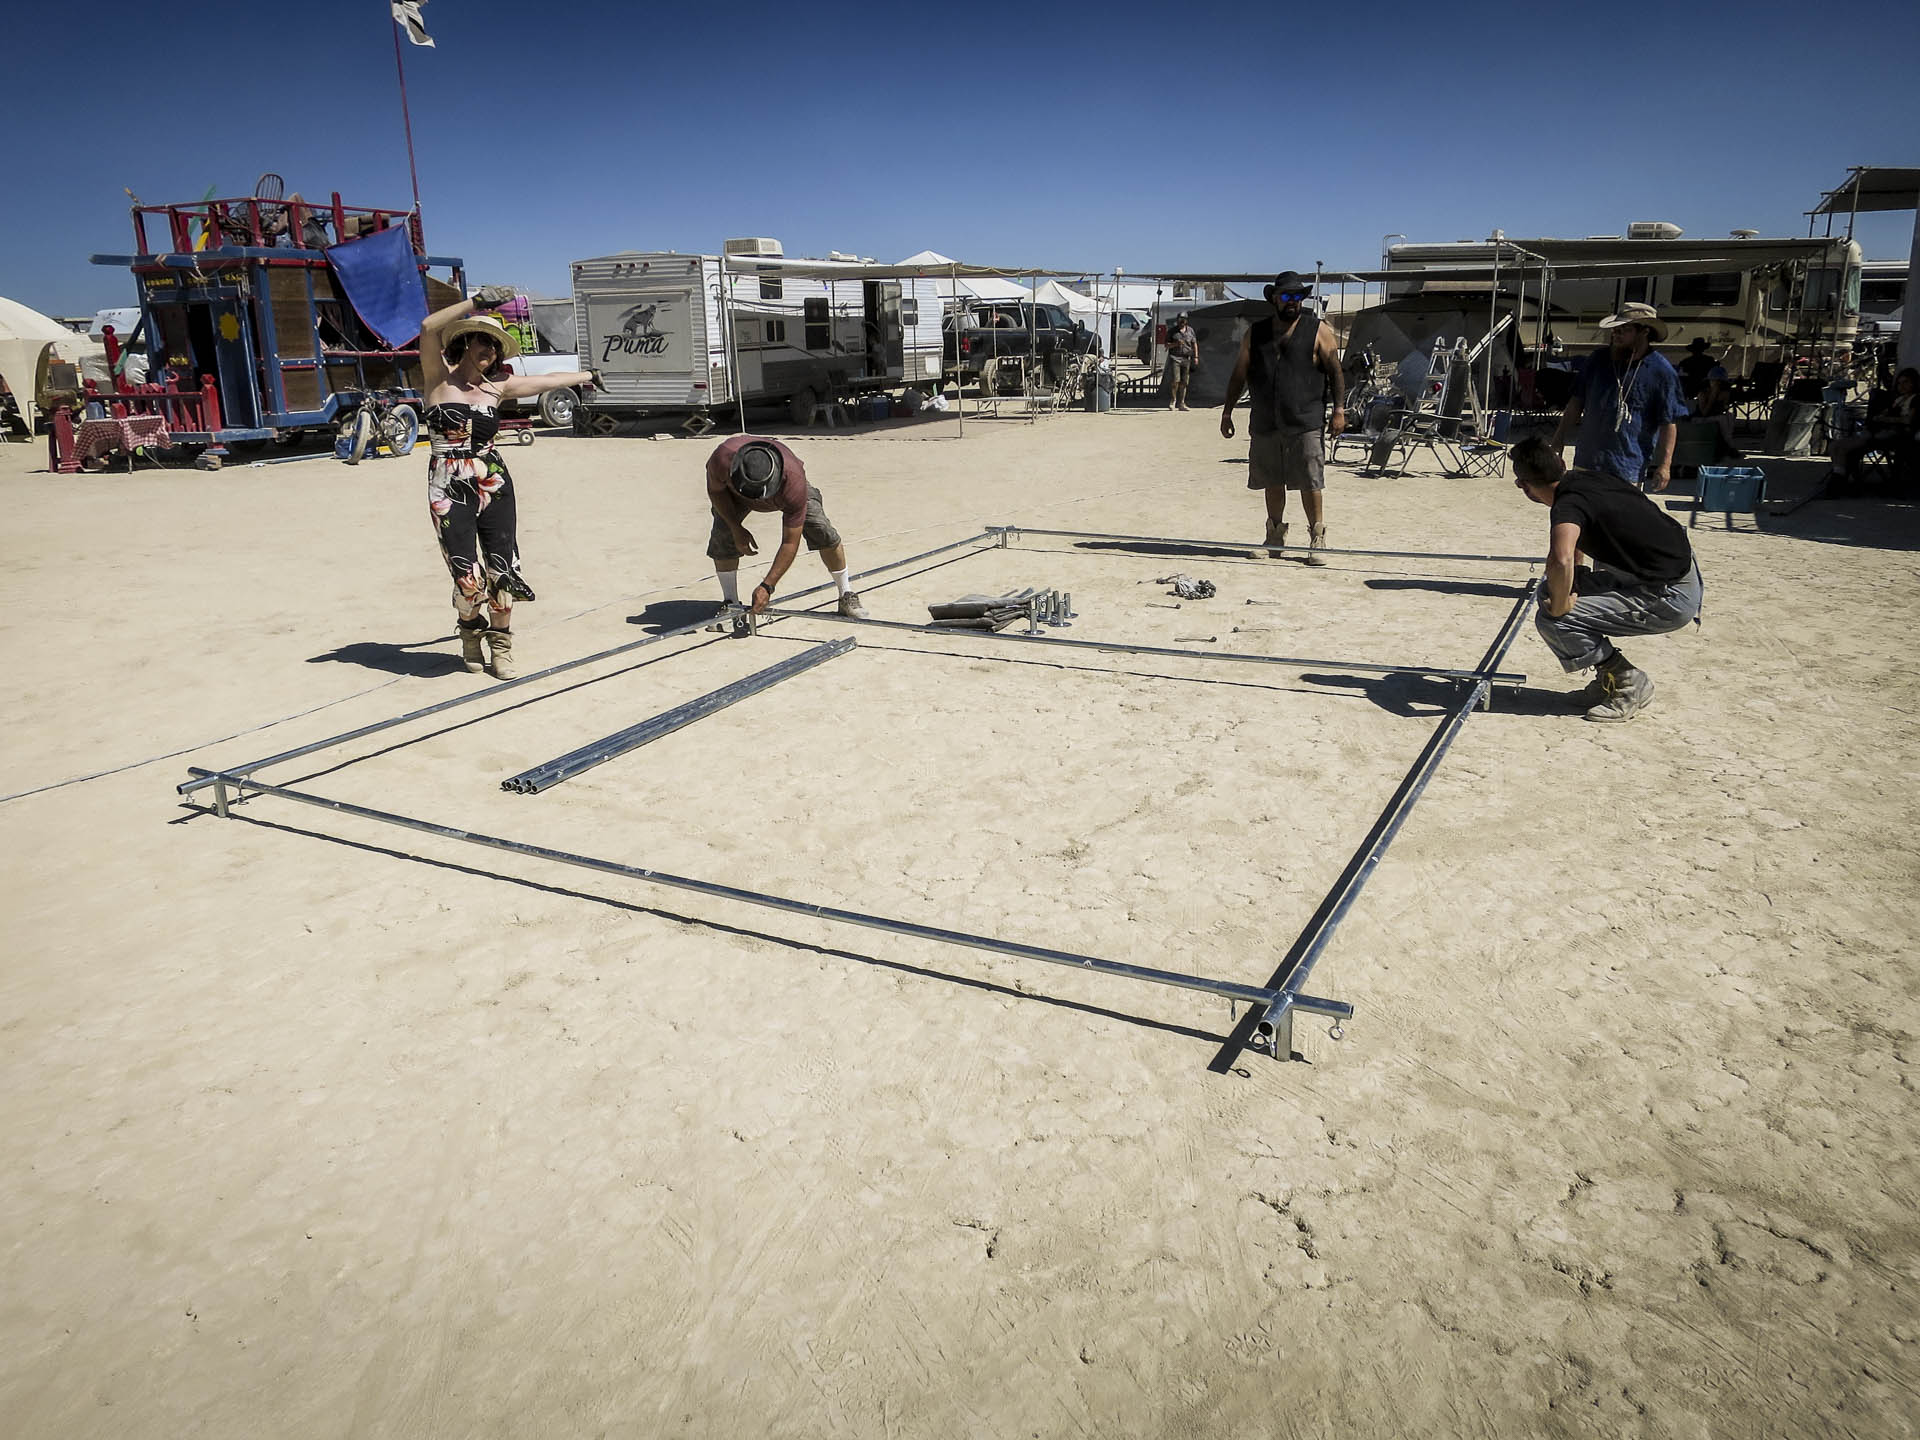 Step 2: Connect roof poles
Connect all roof pipes and fittings. Make sure to place all five-way fittings with the vertical extension facing down. Tighten eye bolts gently with a tool. Do not over tighten.
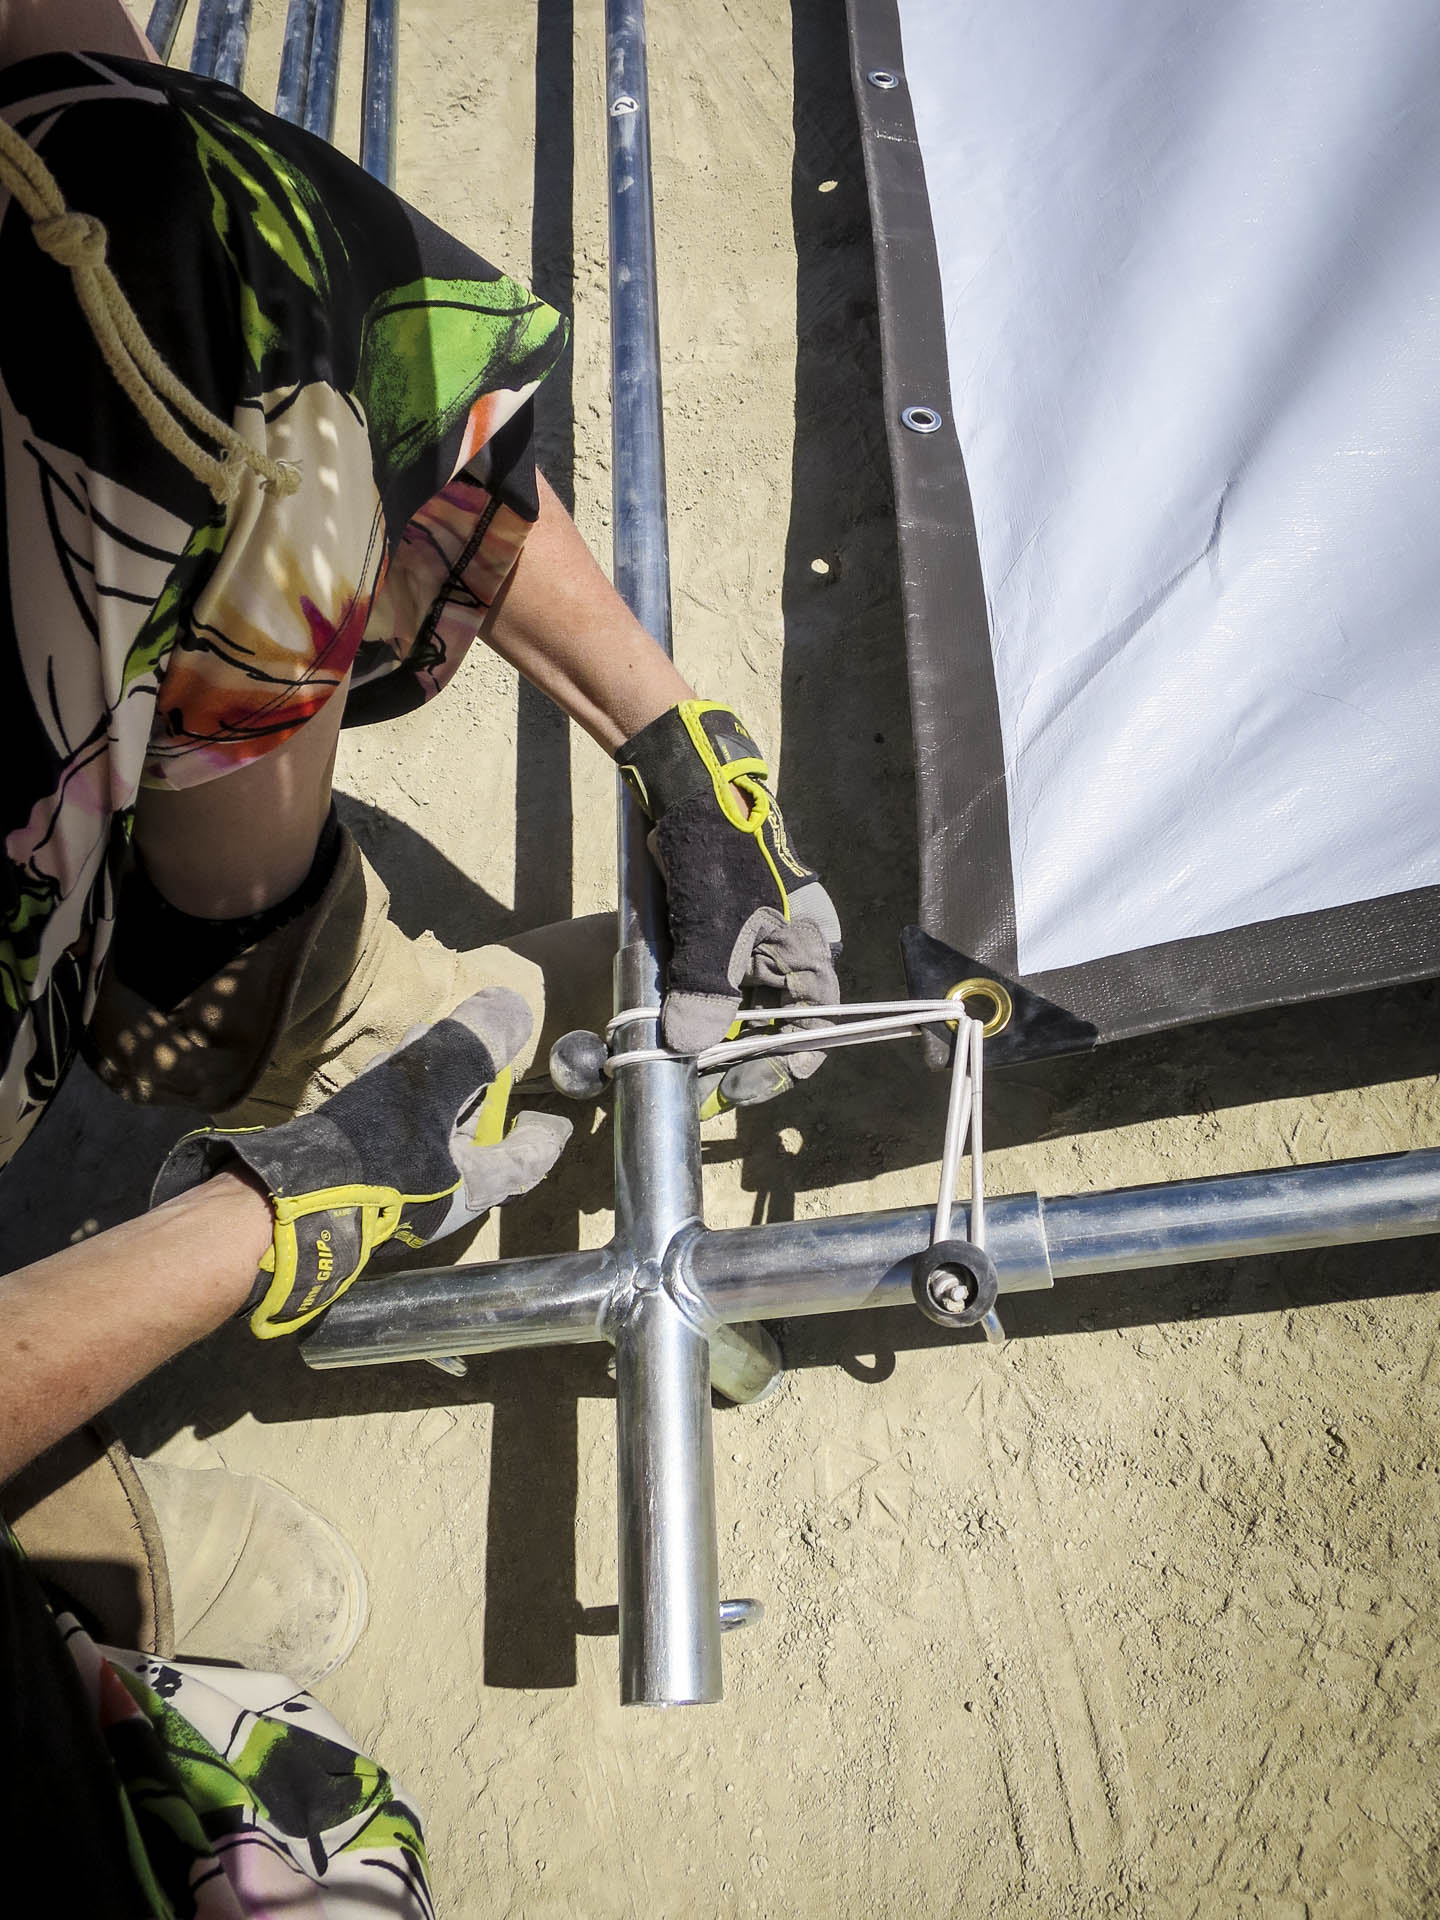 Step 3: Attach tarp with ball bungees
Lay tarp over assembled roof frame. Start by attached the tarp corners to poles with ball bungees*. Use two ball bungees at each corner, one for each pole. Once corners are fastened, use a ball bungee at every grommet to secure the tarp.
*To use a ball bungee, push elastic through grommet and pull until the plastic ball is resting against the tarp. Loop elastic around the poll and back over the plastic ball.
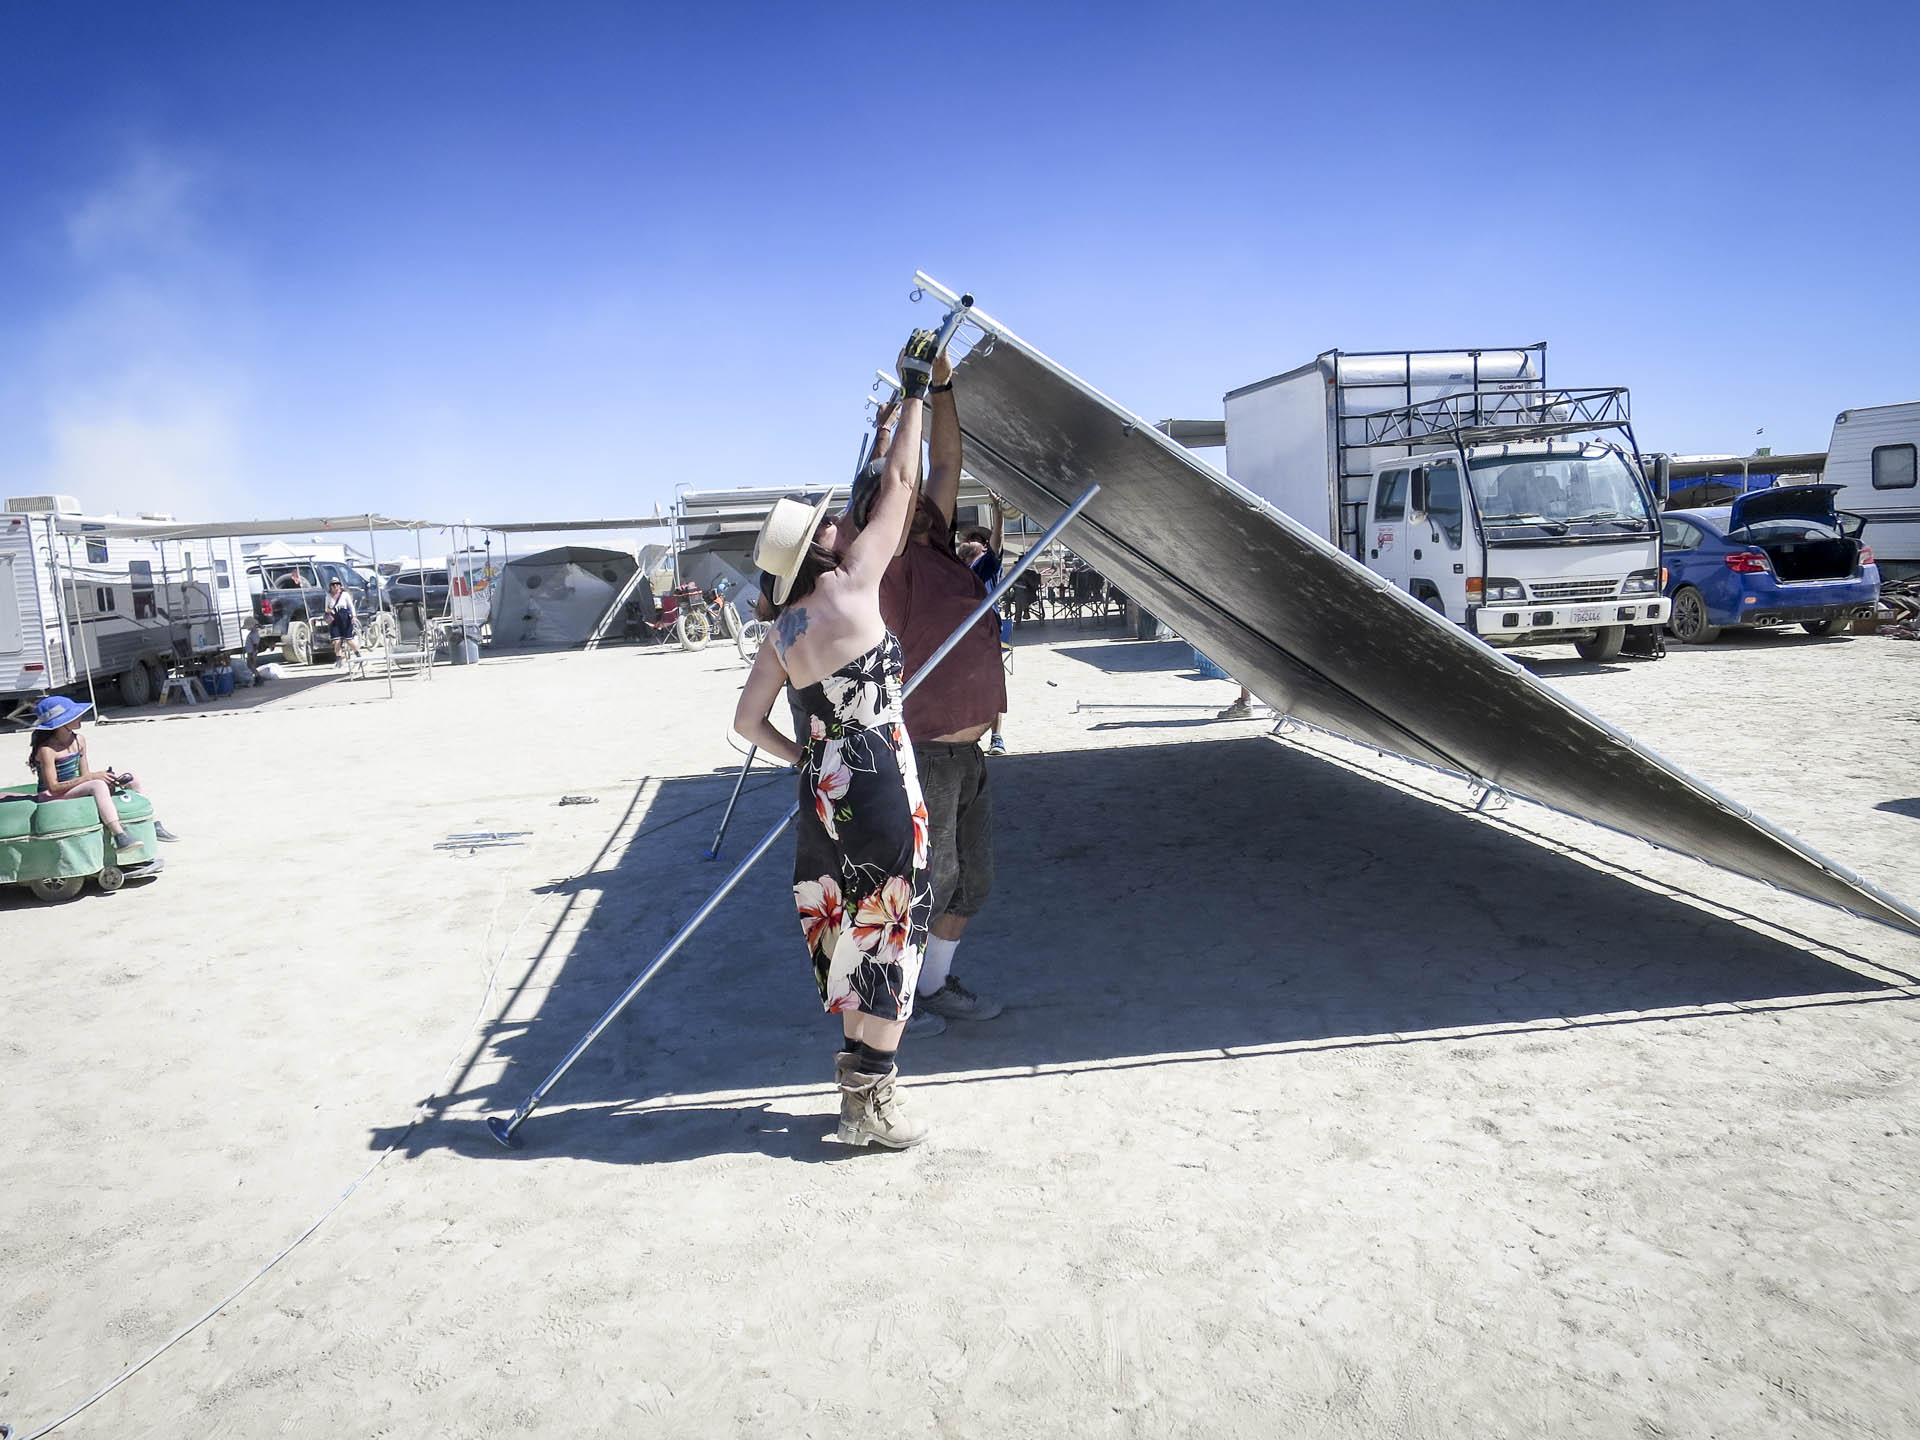 Step 4: Raise half the roof
This step is best done with 2-3 people.
Lift one side of the roof and insert leg poles into the fittings and tighten eye bolts.
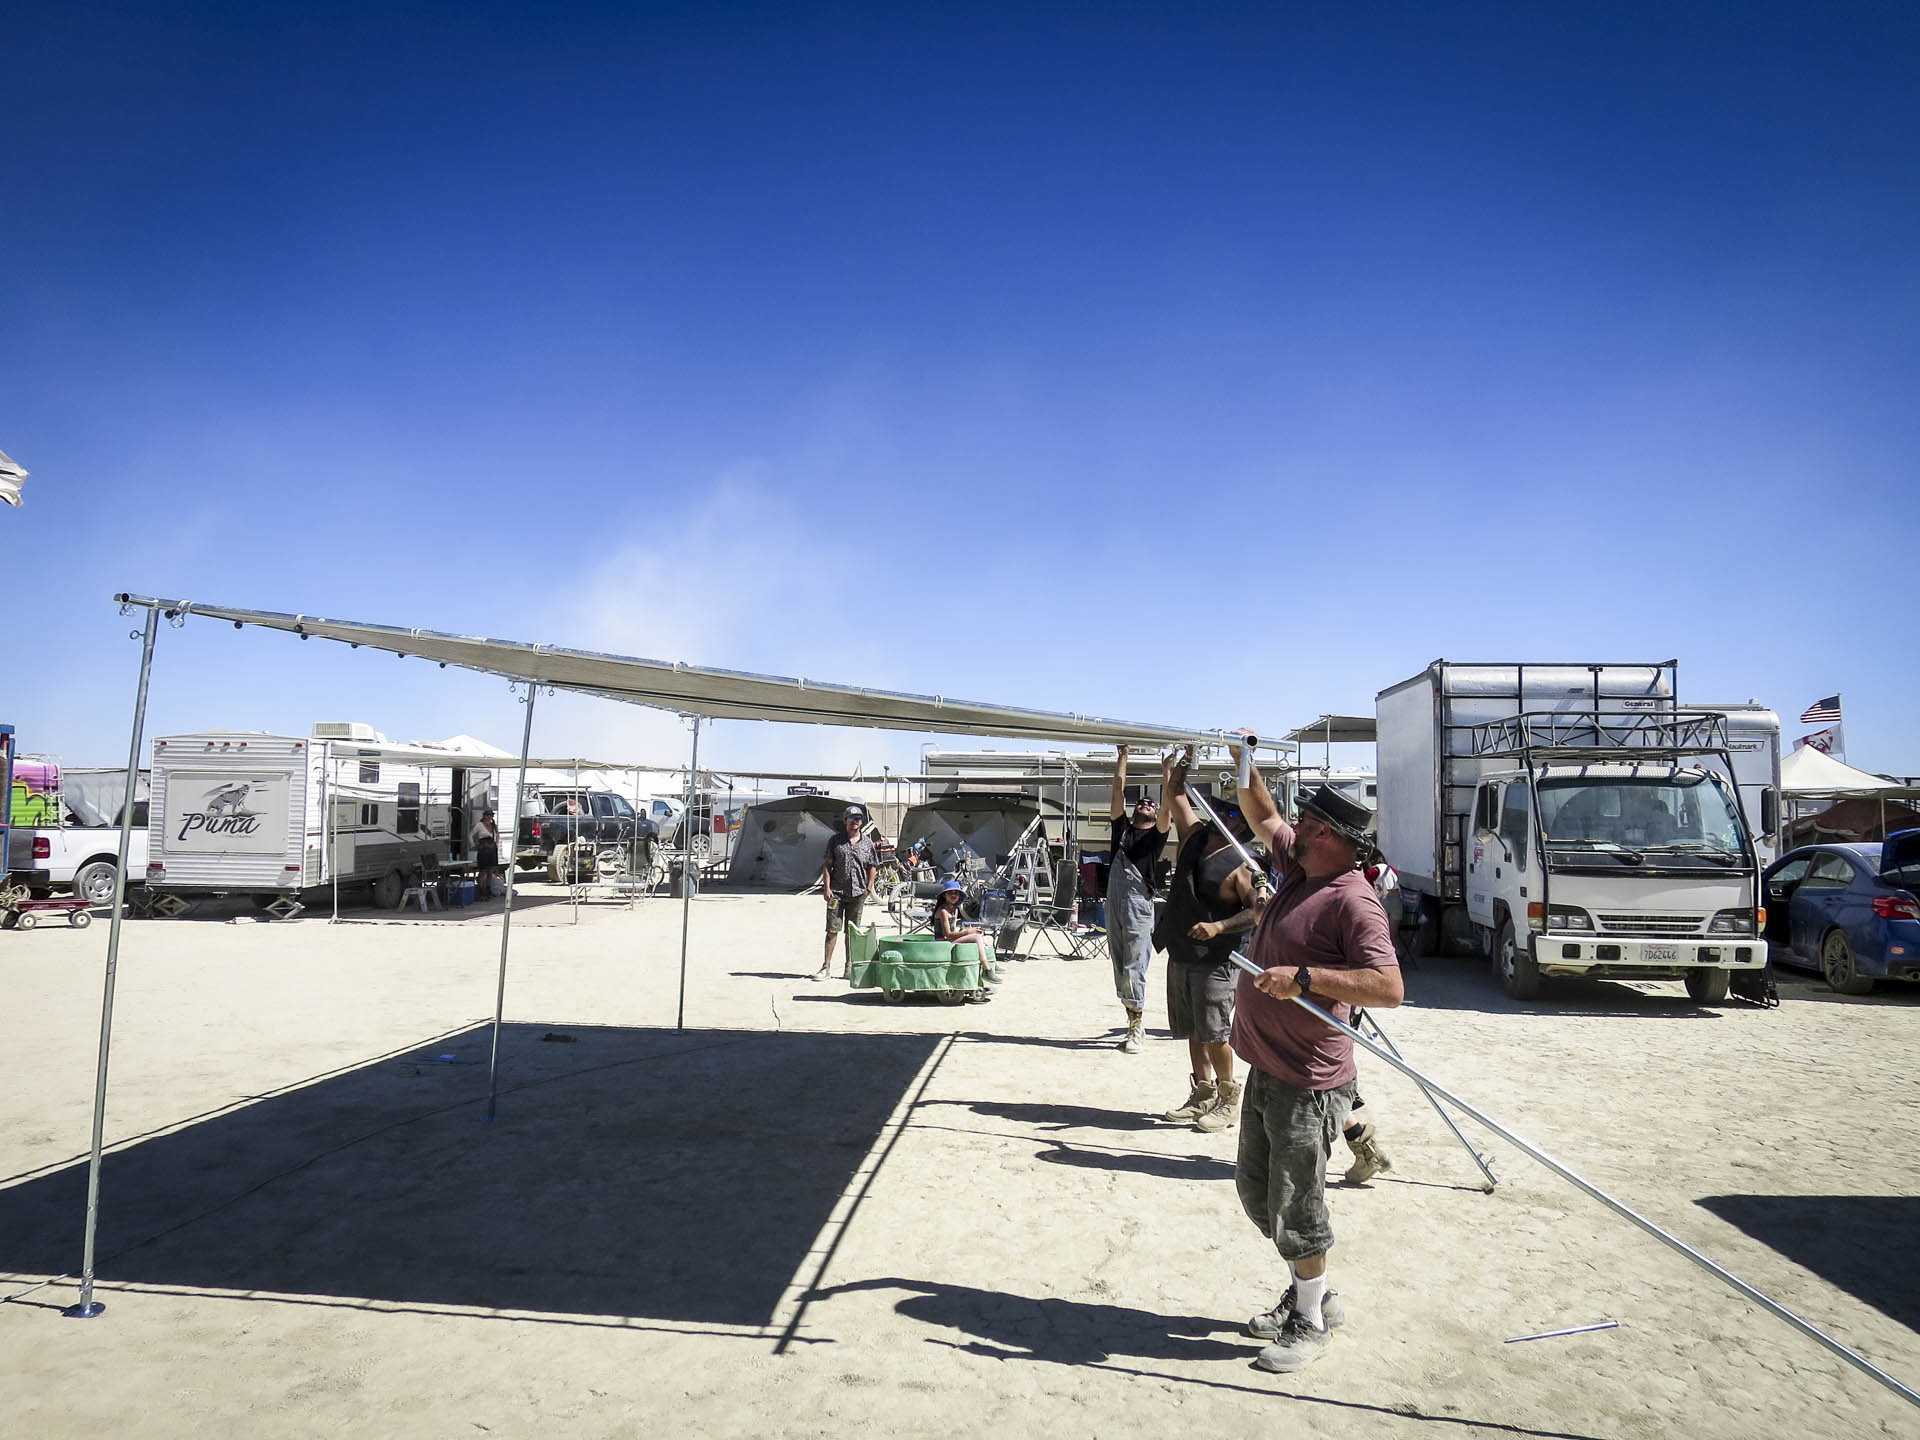 Step 5: Raise the roof
Lift the opposite side of the roof and insert remaining leg poles and tighten eye bolts with a tool.
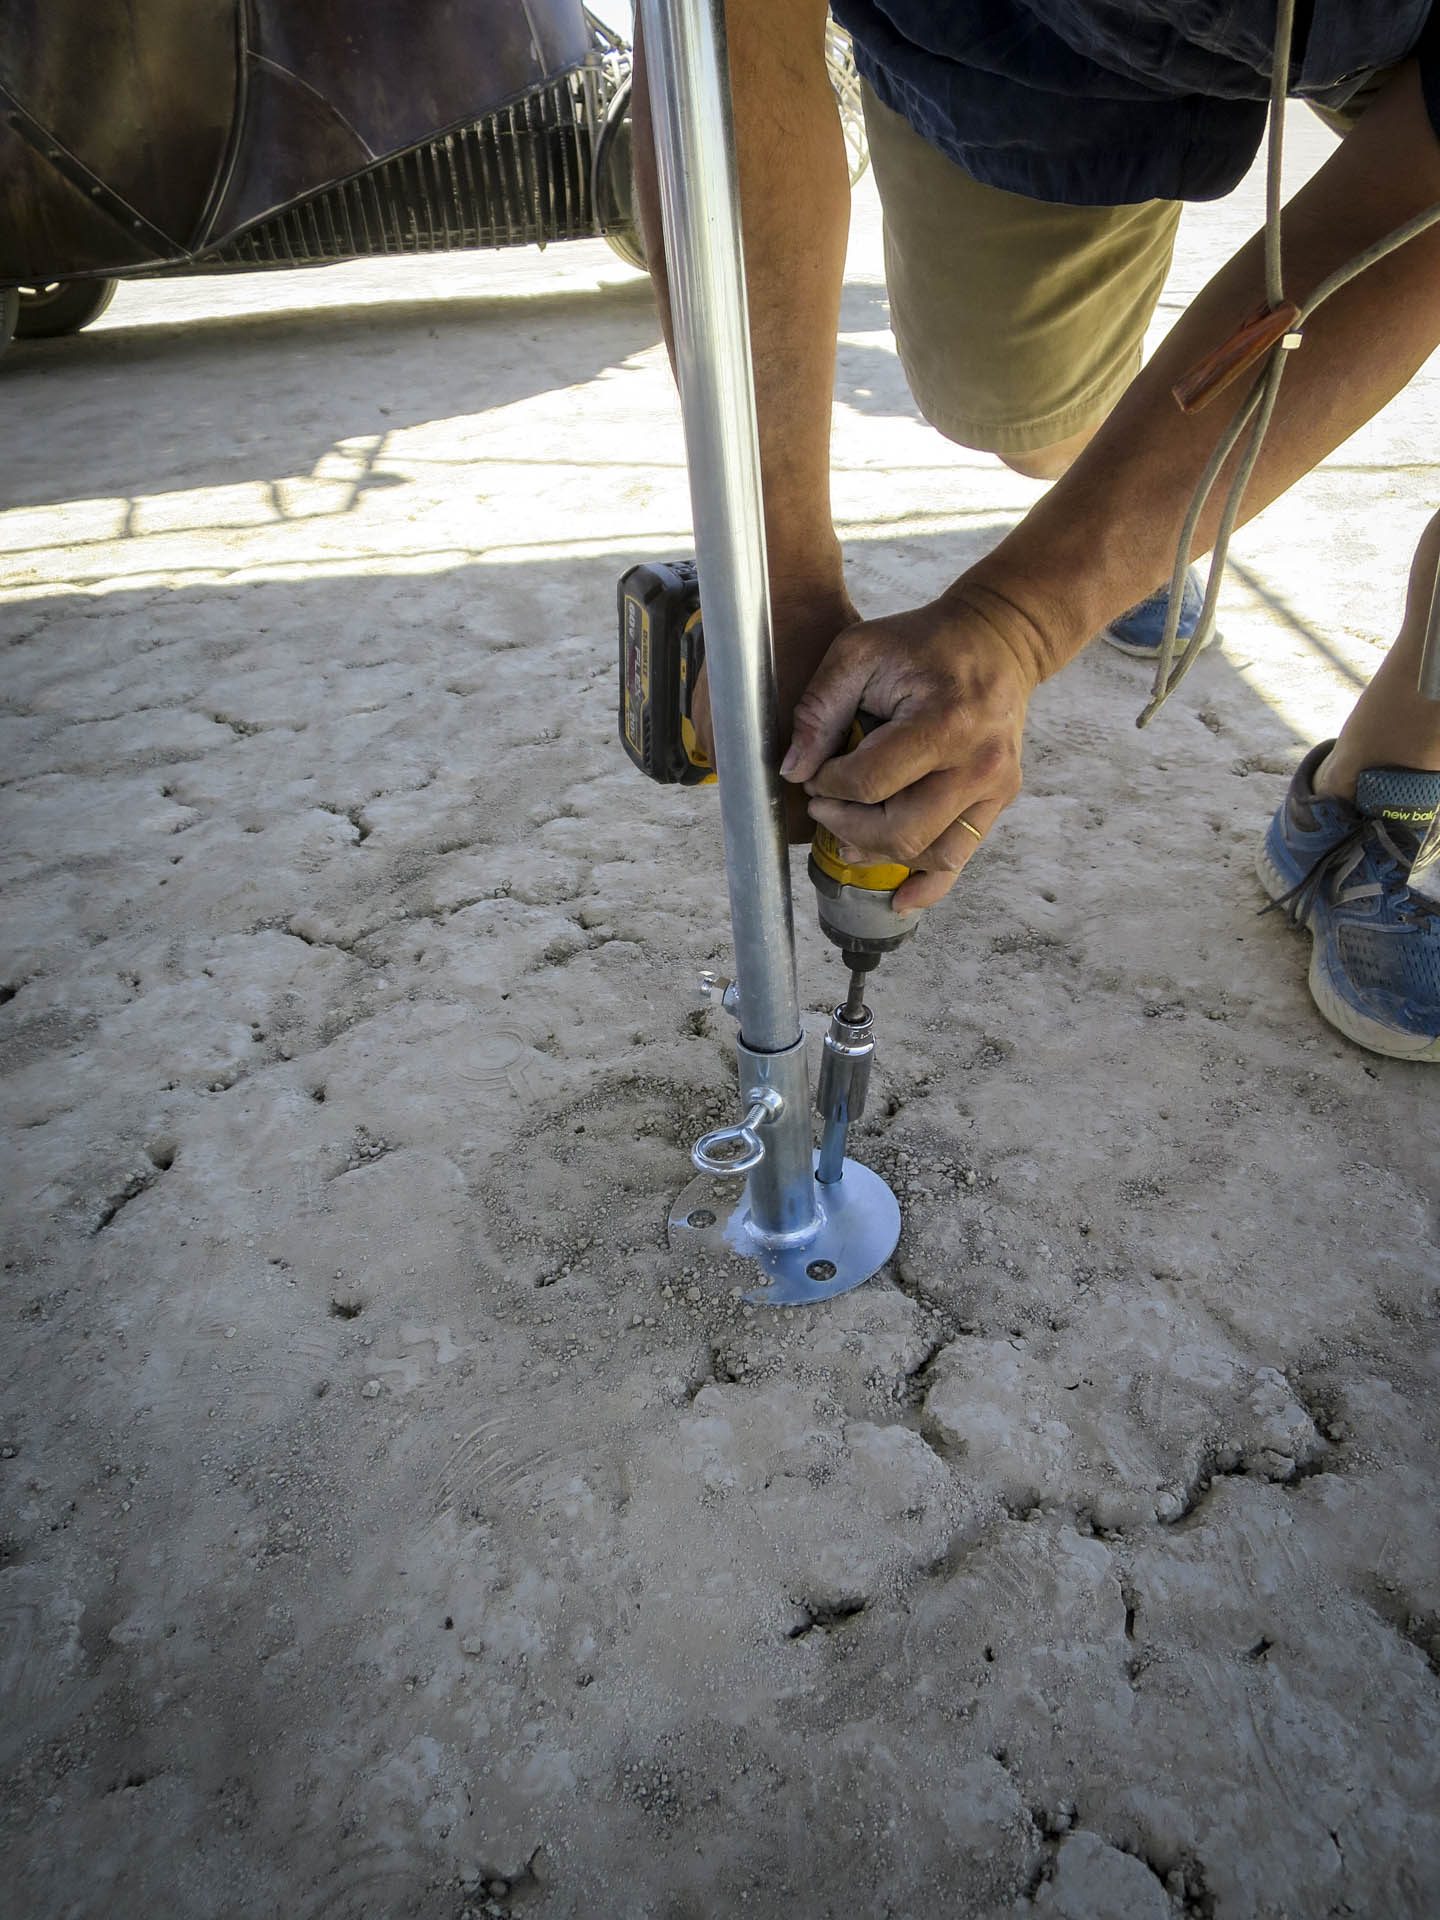 Step 6: Drive your lag bolts
Option 1:
Make sure the legs are even and straight. Drive lag bolts into one of the foot holes. Tighten the eye bolt on the foot to the pole. Repeat with remaining legs. This is a fast and easy setup but the eye bolts have been known to jiggle free.
Option 2:
Make sure the legs are even and straight. Drive lag bolts into the ground through the center of the foot pad about 4″ to the same side of each leg. The 18″ lag should be driven straight in until about 2″-3″ of the lag remains above the top of the foot.
Once all lags are driven, lift one leg, inserting the re-bar into the pole. Tighten the bolt to the lag, then tighten the lock nut against the welded nut attached to leg. This will keep the bolt from jiggling loose. then tighten the eye bolt to the pole. Repeat with remaining legs. This is the most secure way. I would use this for remote open sites with very little wind protection from other structures. Check all of the leg fittings top and bottom daily regardless.

Step 7: For shade structures 36′ x 20′ & larger
If you bought a 36′ x 20′ kit, or add-on kits, first erect 24′ x 20′ of your shade as described above.
For the remaining 12′ x 20′ sections
- Assemble the roof poles on the ground (steps 1 & 2)
- Add one half of the legs (step 4), and attach to side of the 20′ x 24′. Tighten all eye bolts.
- Adjust the legs to straight vertical positions. Move to the side, then see (step 6)
- Attach the roof tarp (step 3) at the erected height. A step ladder is useful.

Can I just buy the connectors? I have enough stock to cover the rest. Just wondering. Hope all is well.
Email us orders@formandreform.com